RAW vs JPEG Format
Posted Thursday, 27 January 2011 by Louis Au in
Louis Au,
Photography
Most of the pro and semi-pro digital cameras on the market today are capable of saving the captures in both RAW and jpeg formats. For digital capture professionals, RAW format arguably is the most useful file format invented.
The RAW file format is often referred to as the digital negative. It contains the 'RAW' pixel information straight out of the digital camera sensor. The 'RAW' data, however, needs to be converted before it can be used as an RGB image file in an image editing application for file production. This is often referred to as demosaicing: the process of converting the samples provided by the mosaic-like colour filter array of a digital camera into a full-colour image.
Why shoot RAW?
The lossless RAW format has a lot of advantages compared to lossy jpeg format. When you shoot RAW, only the shutter speed, aperture, and ISO are permanent. The other settings like white balance, tone curve, colour space, contrast, saturation are written to the capture as metadata that accompanies the RAW file and can be adjusted in post processing with no loss in quality.
The convertor/image editing application will use the EXIF information as a guide in the RAW file processing routine. The same original can be re-purposed for different usage such as web, 4-colour printing, without causing any degradation to the original file quality.
The RAW format has a much greater dynamic range. It contains 4096 levels per 12-bit RGB channel or 16,384 levels per 14-bit RGB channel compared to a maximum of 256 levels per 8-bit RGB channel in the jpeg format. Better dynamic range allows for more control over highlight and shadow details. With RAW format, the photographer is getting the maximum possible image quality that can be delivered by the camera.
Exposure. Correct exposure is critical!
The sensor on the digital camera captures data in a linear fashion. Half of the data in a RAW file is devoted to the brightest f-stop. Therefore it is critical to know where to place your highlights in an exposure since this will help in maximizing the signal-to-noise ratio.
Overexposing will clip the highlights resulting in complete loss of highlight details. If you are tempted to underexpose to hold highlight details, you run the risk of compromising the shadows details. Even though you can compensate for the exposure in the RAW convertor, you will inevitably end up with noise and posterization issues in the midtones and shadows.
If your digital camera captures 6-stops of dynamic range, the first 2048 levels are devoted to the brightest stop as indicated in the diagram above. Subsequently, the half of the remaining 2048 levels are devoted to the next stop, and so on. The darkest stop where the shadows reside will retain only 64 levels. If you underexpose and need to make exposure compensation by spreading the shadow data over a wider tonal range, you are guaranteed to have unwanted noise and posterization. There is a limit on how much you can open up with only 64 levels of shadow data.
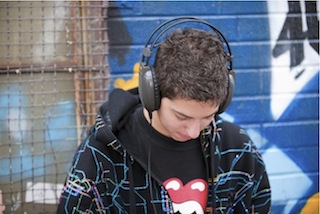
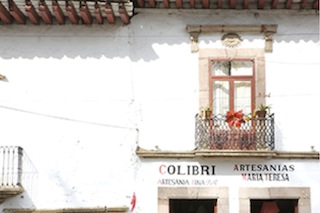
Here are some real world samples:

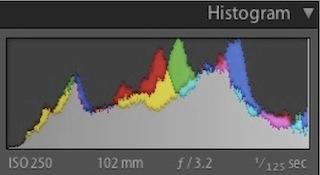
Good exposure with even histogram before tonal adjustment
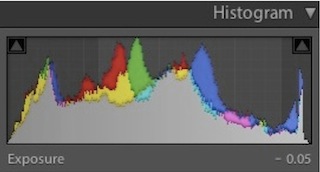
Good exposure with even histogram after tonal adjustment


Image with large amount of highlight and quarter tone levels before tonal adjustment
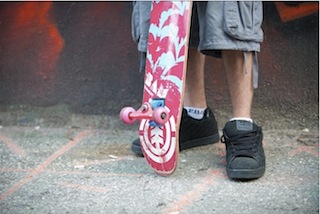

Image with large amount of highlight and quarter tone levels after tonal adjustment
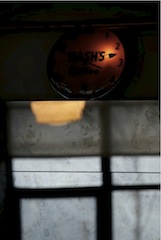
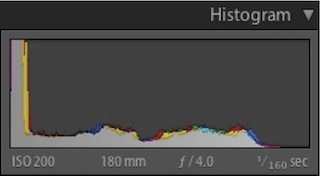
Image with large amount of shadow and three-quarter tone levels before tonal adjustments
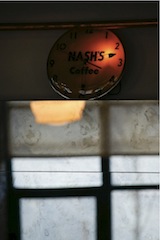
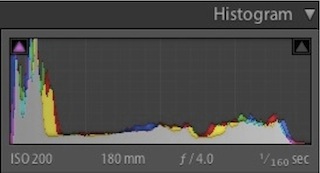
Image with large amount of shadow and three-quarter tone levels after tonal adjustmenta

Over exposure with histogram showing a 'cliff' on the far right (Highlight Clipping)

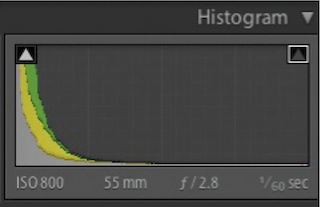
Under exposure with histogram showing a 'cliff' on the far left (Shadow Clipping)
Correct exposure in captures is critical, despite the greater dynamic range and post-capture editing potential of the RAW format. The old rule of GIGO (Garbage in, Garbage out) has never been more important. Unlike film transparencies, the original RAW capture is your digital negative and it is not your finished product. The RAW file has to go through a 'manufacturing process' in RAW conversion to develop the image you envision. The better the input, the better the end product.
Correct exposure in the world of digital capture means keeping the highlights as close to the right side of the histogram as possible without blowing out the highlight details. This is known as 'Expose to the Right'. With 2048 levels of tonal detail to work with, the brightness areas of your image can hold amazingly subtle highlight information.
The latest RAW convertors on the market today have sophisticated highlight recovery tools to extract the data at the front end of the histogram. The increased exposure also provides critically better signal-to-noise ratio in the shadow areas thus resulting in a better image.