How to Create Perfect Digital Black & White Photos
Posted Sunday, 4 February 2007 by Gudmund in
Photography,
Design
Have you ever wanted to create some stunning black and white images, but found your colour photos to be dull and uninspiring when converted to greyscale?
- Here are some simple tips on how you can get full control of how your photos end up looking in black and white, whether they are dramatic landscapes or casual portraits.
If you thought that creating a B&W photo is just a matter of getting rid of the colours; yes, it can be that simple, but it's quite unlikely that Ansel Adams would agree with that assertion – black and white can be so much more than that. We will use Photoshop CS and various adjustment layer functions, so we assume a basic understanding of how adjustment layers work, but you may want to try adapting some of these tricks if you use Photoshop Elements or another image editing application too.
You should start out with a colour photo, so if you're on your way out, camera around your neck, ready to create your next B&W masterpiece, keep that in mind. Even if your camera has a black and white or sepia setting, just stick to the colour setting. This also makes things easier in that you don't have to choose between colour or black and white when you take the photos, you can decide that later.
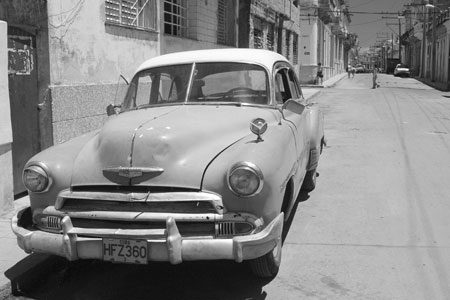
Here's the original jpeg photo we want to start out with:
Grayscale mode
The most basic way to create a grayscale image is obviously to change the colour mode to grayscale, but there is a good reason why we don't want to do this: the resulting grayscale image (in 8bit/channel mode) can contain up to 256 different shades of gray, which might sound like a fair bit, but isn't really very much if you want to start making adjustments to the image and shift those tones around. You'd want to keep as many tones in the image as long as possible, so keep the image in RGB mode for now.
Converted to grayscale, this is how our image looks:
Desaturate
You could use the 'desaturate' command on the image – this would keep the image in RGB mode, where each of the colour channels can accommodate 256 shades, so now we potentially have 256x256x256 = 16.7 million different colours. This is a much better startingpoint than the grayscale option, but it still doesn't give us any detailed control of just how the image looks in greyscale; to achieve this we need to go one step further.
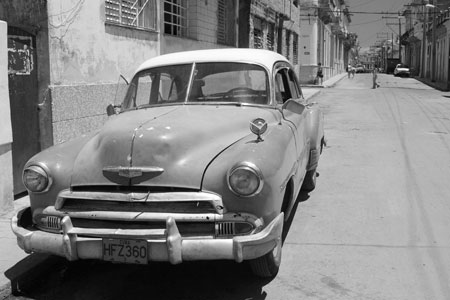 Desaturated while kept in RGB mode, the image looks similar, but this is a better startingpoint even if we want to make quite simple adjustments to the tone and contrast of the image.
Better Black and white photos: Monochrome Channel mixing
A simple way to get better control over your black and white conversion this is to create a Channel Mixer adjustment layer and tick the 'monochrome' option. This is a quick method that can often yield a significantly better result than simply desaturating an image and provides some potential for individual adjustments, so it is always worth trying out.
If, however, we want full control of how each colour is rendered in the grayscale image, we need to go a step further still:
 The image converted to Black and white using the monochrome Channel Mixer.
Great Black and white photos option 1: Channel mixing
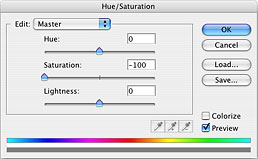
The first step with this method is to create an Hue/Saturation adjustment layer where you move the saturation slider all the way down to give a desaturated preview image. Now you have a greyscale image where you can still adjust the tones of the different colours on the original image underneath your adjustment layer.
Next, create a Channel Mixer adjustment layer, but this time leave the 'monochrome' option unticked. Have a play around with the sliders for each colour channel to get a feel for what they do – in the beginning this is very much a matter of trial and error, and you may find it tricky to get the image looking exactly right using the Channel Mixer tool alone. If this is the case, try adding a second Curves or Brightness and Contrast adjustment layer in order to adjust the overall image contrast and tone. But if you simply find the Channel Mixer too difficult to control, the next option might be the one for you:
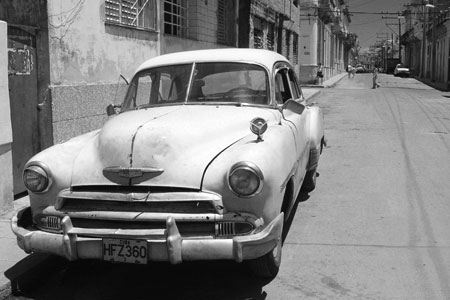
 A version of our image created using the Channel mixer in colour mode.
Great Black and white photos option 2: Hue/Saturation adjustments
Start out again by creating an Hue/Saturation adjustment layer with the saturation slider moved all the way down. Next, create a second Hue/saturation adjustment layer, making sure that this layer is
directly above your background layer – otherwise the adjustments you make will have no effect.
Next, select the individual colours in the dropdown menu, adjusting the lightness slider for each in turn (the hue and saturation controls will not have any effect). You will notice that this method gives you superior control over the rendering of the different colours in your image, which is particularly great for landscapes with clearly defined blue and green elements - creating those dramatic skies is a breeze!
You might want to add a further Curves adjustment layer to control the overall contrast and lightness/darkness of your image.
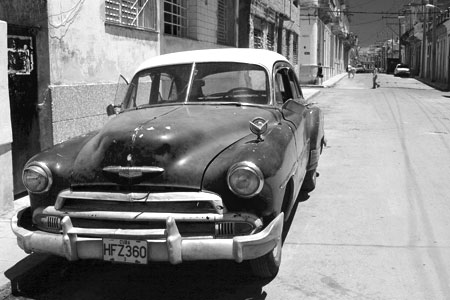
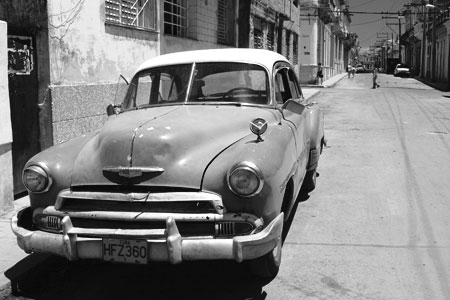
 Here's a version of our image created with hue and saturation adjustments alone…
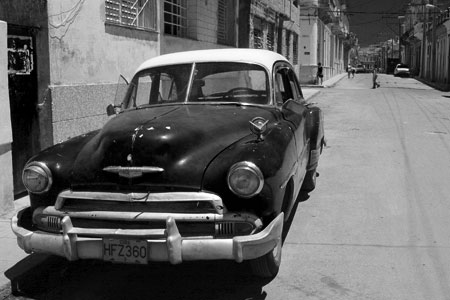 …and another, dramatically different version, achieved mainly by adjusting the lightness of the cyan channel.
And if you still don't achieve the look and feel you had in mind with these tools, you could try the curve tool on the separate red, green or blue channels for more radical adjustments.
Great Black and white photos option 3: improved tools in Photoshop CS3
The developers at Adobe have realised the demand for better control over Black and White images, so the CS3 incarnation of Photoshop introduces a dedicated Black and White conversion tool.
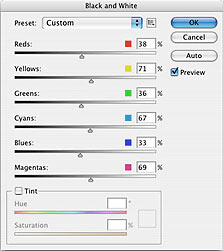
This tool does in fact do pretty much the same as the option 2 that we have described here, but it is certainly easier and quicker to use since you can control each colour tone without navigating through a dropdown menu.